Tuesday 31 May 2016

Beth Studley Blog Hop: Radiance

Welcome to another stop on the Beth Study blog hop to launch her new Radiance fabric range for Makower and her e-Book, Mini Patchwork Projects.   I confess I only found out about Beth's patterns and fabrics about a month ago when I saw her pod pattern sewn up and was compelled to buy it straightaway so when I got approached for the blog hop, it seemed serendipitous.   I don't usually review e-Books but Beth's speciality seems to be useful little storage makes - this book includes six mini projects - so I made an exception.  I sewed up the trinket bowls with a few adaptations to make them Goldilocks style: large medium and small fitting concentrically inside each other!


Beth Studley is a UK designer and her Radiance fabrics are inspired by antique lace and crochet so I've added some crochet daisies (made by Penny) and some vintage lace found over the years and you can see how the circles and motifs are picked up in the designs.  I get a hot, spice feel from the colour palette, Moroccan even with the rich saturated colours. 


There are six projects in Mini Patchwork Projects:a magnetic picture holding garland, the reversible trinket bowls which I made, a petal pin cushion, hexi needle case, a foundation paper-pieced coaster set and a note book cover .  Each project details the experience level needed (from beginner to advanced) and the techniques covered.  The latter are also detailed at the beginning of the book and there are full size templates to print off at the end.   Beth's instructions are detailed and well explained.  There are a multitude of options to buy the e-Book or individual patterns or even a video  I deviated slightly from the pattern by quilted in parallel straight lines rather than criss crossing, and I changed the size of the bowls.  


Quilting the fabrics to make the bowls does take a while so I chain quilted sewing straight from one piece to another.  I also printed the bowl template at 80%, 90% and 100% to get the size variations.  This worked well on the smaller bowls but the biggest bowl was quite a lot bigger so I used a larger seam allowance when sewing the inner and outer layers together to reduce the size slightly.   Darts are used to create the bowl shape and you can see how I sew my darts above- with a pin marking the end, I slide it out before the needle hits it.  

I hand sewed with a stab stitch method around the top of the bowls using Aurfil 12wt.  I love the thickness of this thread and it's now my weight of choice if I want a chunkier hand quilting or a running stitch as embellishment.  The stitching defines the bowl edges and gives a little extra decoration to the outer bowls (made from yarn dyed Essex linen)


On each bowl I picked out some of the print motifs to bring out a little definition to the base of the bowls - circles on two of them and a criss cross stitch on the star print. 


The bowls are soft but sturdy enough to hold sewing accoutrements.  I thought they might be suitable for a toy too?  Bowls for play food and teddy tea parties?    For a chance to win some of the Radiance fabrics to play with you can either enter a competition here at Stitch Craft Create or Justine of Sew Justine Sew is having a giveaway here- bonne chance!


{Disclosure: I was sent a free copy of the e-Book and the fabrics to participate in this blog hop.  All opinions and content are as ever, my own} 

sib blog

Monday 30 May 2016

Farmer's Wife 1930s Quilt Along: Blocks 73 and 74, Mrs Taft & Mrs Thomas

Welcome to another Farmer's Wife 1930s QAL Monday.  The first block, Mrs Taft (p.232, letter p.109), I chose to add to my group of half blocks- I need eight for the twin quilt layout in the book. Chase is guest blogging on this block so pop over and take a look at what she has done and read about her techniques. 


Fabric credits:
Pam Kitty Morning Recipe Text Fabric, Holly Holderman, Lakehouse DryGoods : gift from friend 

{Please note:  On both blocks I have linked to my sponsors for fabric bought through them and elsewhere for anything that has come from other shops}


I enjoyed making Mrs Thomas, Block 74, Mrs Fay (p. 233, letter p.51).  Although there are a lot of pieces there is a lot of repetition so the cutting is straightforward and there are only three sections so once the fabric is precut and I started chain piecing, it came together nicely.


Fabric credits:
Pink and green dotty/floral: gift from friends 
Robert Kaufman Fabrics, Penny's Dollshouse, Floating Leaves

I foundation paper pieced this block and used the rotary details below which will produce pieces approx. ¼" bigger than needed.  I played around with the colour scheme to break up the shape.

Q: You may be wondering why I choose half-square-triangles or quarter-square triangles when I list the rotary cutting details?  What difference does it make?
A: I like to avoid any bias grain on the outer edge of the block, so for example, with the large background triangles, if I had suggested half-square-triangles there would be bias diagonal edges that might ripple and stretch out of place making the block too big.  By instead cutting these using the quarter square triangle option, the outer edge uses the straight grain and will maintain it's shape better!

Rotary Cutting Dimensions 
Background Fabrics
Very small HSTs: cut (12) 2" squares; sub-cut each square once along each diagonal to yield 2 half-square triangles per square. (Total yield= 24 HSTs)
Large QSTs: cut (1) 5 ½" square; sub-cut square twice along each diagonal to yield 4 quarter square triangles.

Pink
Small HSTs: cut (4) 2 ½" squares; sub-cut each square once along each diagonal to yield 2 half-square triangles per square. (Total yield= 8 HSTs)

Green
Centre Square: cut (1) 2 ⅜" square
Small HSTs: cut (4) 2 ½" squares; sub-cut each square once along each diagonal to yield 2 half-square triangles per square. (Total yield= 8 HSTs)

Top tips for foundation piecing this block
  • Pre-cut all pieces
  • Use a water based glue stick. I use Sewline, to stick the first piece of each section
  • Chain piece where possible 
  • Mark in seam allowance around edge of each section 
  • Sew the section seams in stages, baste the seam points in place first, especially for the centre square.
  • Flatten seams with Flatter or similar light starch spray
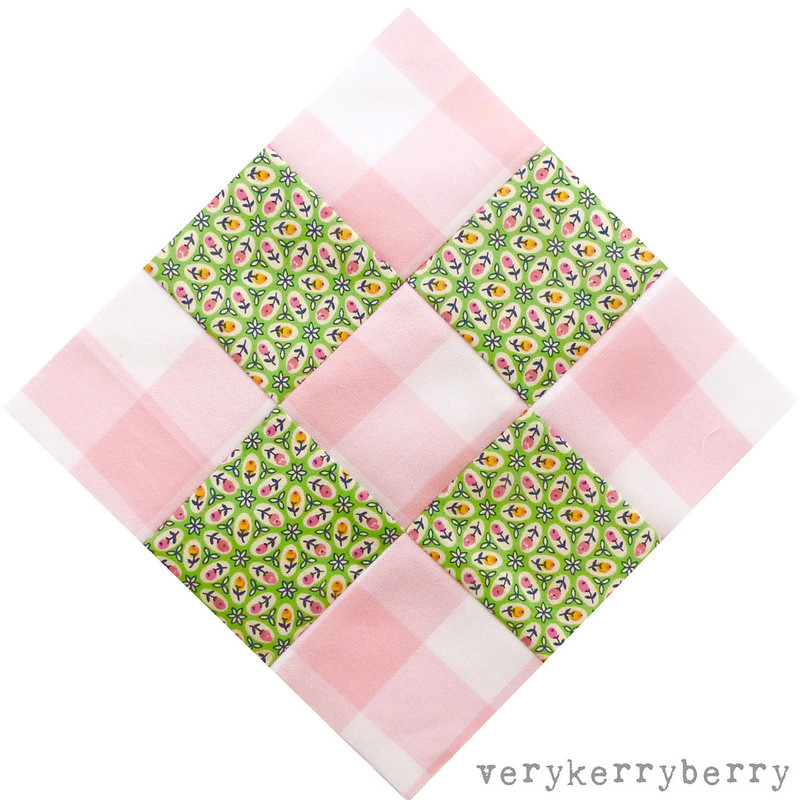
Here are my nine-patch extra blocks that I've been making inspired by all the prints I've been using.  


I really like how these are going and the Heather Ross prints seem to be the most wonderful fit.  Her Tiger Lily range has been one of my favourites, especially the roses. 


Remember you can:
  • Hashtag  #fw1930sqal on Instagram and add photos to the Flickr group if you like to share there.  
  • For individual blocks, you can use #MrsTaftblock and #MrsThomasblock on Instagram, Fat Quarter Shop and Angie are using these hash tags, #fw73MrsTaft,  #fw74MrsThomas - I'm using both hashtag systems.
  • You can also copy and paste links to any blog posts you do on these blocks in the comments and I'd love to visit and take a look. 
There's a break next week as I was planning to be at Glamp so I'd built that trip into the schedule. Instead, I'll be writing a post about the fabrics used so far rather than a usual two-block post.   Normal service will return 13th June.   Jo Greene will also be back as a guest blogger.
SaveSaveSaveSave

Friday 27 May 2016

May at Eternal Maker.. new arrivals and a bank holiday discount

Perfect timing for my May visit to sponsor Eternal Maker.  There are a tonne of new arrivals and  a 25% off bank holiday weekend discount- includes everything and lasts until Monday.  There is so much to chose from that I could have filled by nine-patch grid twice or even three times over. 


Each row is numbered from left to right:

1.  Swans Pink Sweatshirt Fleece from Kiyohara.  Perfect fabric for a child's Charlie hoodie or dress,  (See number 4).   There's also Lions and Bears from the same Japanese company.
2.  Seda Dress from Pauline Alice patterns.  This flowing style, including a very on trend off-the-shoulder/cold-shoulder option is perfect for the Atelier Brunette viscose fabrics. 
3.  Bird's Eye blue/green double gauze, Nani Iro by Naomi Ito for Kokka.  Double gauze in my favourite colour. I wasn't even sure whether I should include it, I want it all for myself...also in pink. 
4.  Pre-Quilted Fuccra Rakuen Taupe Nani Iro by Naomi Ito for Kokka.  Brushed cotton top with a polyester batting ready to make into a simple jacket (Grainline Tamarack jacket maybe? ) bags, cushions and more.  106cm wide. 
5. Charlie Hoodie and Tunic,  Two Stitches Patterns, PDF download.  Unisex children's pattern from Eternal Maker's very own in house Two Stitches designs.  Hoodie or Hoodie tunic/dress options and sizes 6-12 months through to 9 years so a long life span!  For medium to heavy weight knit/jersey fabrics.  
6.  Atelier Brunette Blossom Coral (Viscose Rayon)  Gorgeous fabric from one of my favourite French fabric houses.  Medium weight, beautiful drape, perfect for dresses and blouses. 55"/140cm wide.   See more viscose from Atelier Brunette here
7.  Pon Pocho ivory/turquoise double gauze, Nani Iro by Naomi Ito for Kokka.   More double gauze in Naomi Ito's classic Pon Pocho design. 
8.  Liesl+Co Gallery Tunic- top/tunic/dress.  Liesl's instructions are always impeccable.  This would work beautifully in Atelier Brunette viscose or Nani Iro double gauze. 
9.  Atelier Brunett Nude Facet (Viscose Rayon)  More gorgeous French fabric with a beautiful handle.   See more viscose from Atelier Brunette here

The arrival of Atelier Brunette cottons and viscose along with all the new Nani Iro stock makes my heart beat faster and my mind race with potential plans.  Combined with the 25% price reduction, there is much to tempt me!
sib blog

Thursday 26 May 2016

Bra Making with Madalynne: An investment class

I first started bra making when the Watson pattern was released and had an initial success.  I got the bug after that, had a January blues splurge on supplies- I find these still rather patchy in the UK and the choice is limited- and made a few more with a mixed results.   By the way, if you're looking for UK supplies, I have a list here.    I made a white, everyday Watson for my daughter - perfect fit.  I made another for myself and it was hopelessly large.  Bras are a balance of compression and stretch and changing any of the variables- different fabrics, elastic - can make a huge difference.  After that, my interest and confidence waned and with the exception of a few pairs of knickers I concentrated on clothes and quilt blocks... 


Fast forward to April.  I ended up cancelling my trip to USA and selling my Glamp ticket.  I sold it at a loss for a quick sale but I had a goal for the money, Madalynne's UK Bra Making Workshop at The New Craft House.  I had seen the dates months back but dismissed it as too close to Glamp, now that was no longer happening I needed a pick me up and I had a feeling this would be just the ticket.  It was a 'splash the cash' sort of spend but I had a feeling it would be worth it and as it turned out, it was, with bells on.


 It's the perfect sewing workshop for experienced sewists and as the group came in and I clocked a Kielo Wrap dress and a Hawthorne frock looking very lovely on their respective wearers, it was clear that everyone came with skills.   Maddie, Hannah and Rosie had prettified our workspace, there was coffee, tea,  fruit and yoghurt to start the day and machines were supplied and ready at no extra cost for those of us who required them.  After the initial chat we each opened our named parcel to find a personalised bespoke bra pattern traced out  plus the good quality materials to make it.


The goal was to complete a bra and learn along the way with the aim that it should be close to your desired fit and a detailed trial bra for you to perfect further bras at your leisure.  I think there were twelve of us and Madalynne kept the pace up so that we all systematically sewed the same section at the same time.    There were breaks for lunch and afternoon tea and the food and drinks were thoughtfully chosen and fuelled us nicely.


We all experienced the wonder of using Odif 505 temporary adhesive spray; more commonly used as a basting method for quilters, as an ingenious method of holding double layers of fabric together, stopping elastic from slipping as it's sewn and as a temporary measure for sticking the hook and eye sandwich in place before sewing.  Hannah and Rosie supplied us all with Microtex 70 needles, thread and extra elastic when needed and everyone had an individual cutting mat and rotary cutter to use.     You can get an idea of helpful tools and resources below.  The oddly shaped scissors are Appliqué duck bill scissors, great for trimming layers safely. 


Maddie shared her considerable expertise and answered our many questions.  By 4pm, we all had a completed bra and rushed to the nearby ladies room to try them on.  Most people ended up with a pretty good fit.  Mine fitted perfectly on the cups, even the upper cup which is the area I have the most problem getting a snug coverage.  There was room for improvement but all minor.  My underarm area had stretched out whilst sewing so the fabric was probably a bit too stretchy and I will use a less stretchy fabric for this or line it with something non stretch..  The bridge could be a smidge smaller- maybe ⅛" reduction in width and the back band could be tighter- I think I will reduce this by ⅛" on each side for the next one but to have a well fitting underwired cup without padding is a first for me in either home made or ready-to-wear.  The cups are made from lace and a firm, good quality powernet.  This provides a little bit of give which works brilliantly for a small bust.  Not sure how it would work in a E cup or bigger but I saw another participant with a D cup and her fit looked great.  


 There were three people who needed extra fitting but Maddie did take the time to work out what the issue was and describe how it could be rectified on the next bra.  In the break times, all the sewists sat and chatted and we all commented how impressed we were with the class.  Many people commented how good it was to do a class with advanced skills.


 I came home encouraged and full of fresh knowledge, skills and understanding.  Maddie, Hannah and Rosie help make the day a total pleasure so the class felt like an investment for my future lingerie sewing.  Bra making is a very specific skill and I certainly know a lot more than when I made that first Watson.   In hindsight, I needed a bit of time to pass to understand how the different fabrics worked together, my sizing and it helped that I acquired a vintage Bernina or two- both of which I find sew very stretchy things like elastic more easily than my Janomes.    But I was still a little stuck especially with the idea of ever getting an unpadded, underwired bra to fit.   Maddie had a liberating approach, not too many rules but enough to feel secure.   The mix of powernet and lace seems like the perfect combo for support and adequate coverage- you know what I am saying ladies.  The whole day was packed full of activity and the company was lovely.  If any of you want to learn more about sewing lingerie and get the chance for a Bra Making with Madalynne workshop,  I recommend it.  It was a lot of money well spent.  I can't wait to make another, this weekend is already pencilled in...

sib blog

Monday 23 May 2016

Beth Studley Blog Hop

I'm taking part in a blog hop to promote a British Designer's fabrics and a new ebook, Mini Patchwork Projects with six small project patterns.  Beth Studley's Radiance fabrics, inspired by antique lace and have just hit the shops.


You can see the other people taking part here and there will be a competition during the blog hop.  Beth is an interesting designer, she has some great little patterns on her website-  I saw Beth's pod pattern on Instagram, bought it and that's how I discovered the rest of her work!  I'll be back to share my makes with Radiance and to give you an idea of her ebook

sib blog

Farmer's Wife QAL blocks 71 and 72:Mrs Morgan and Mrs Smith

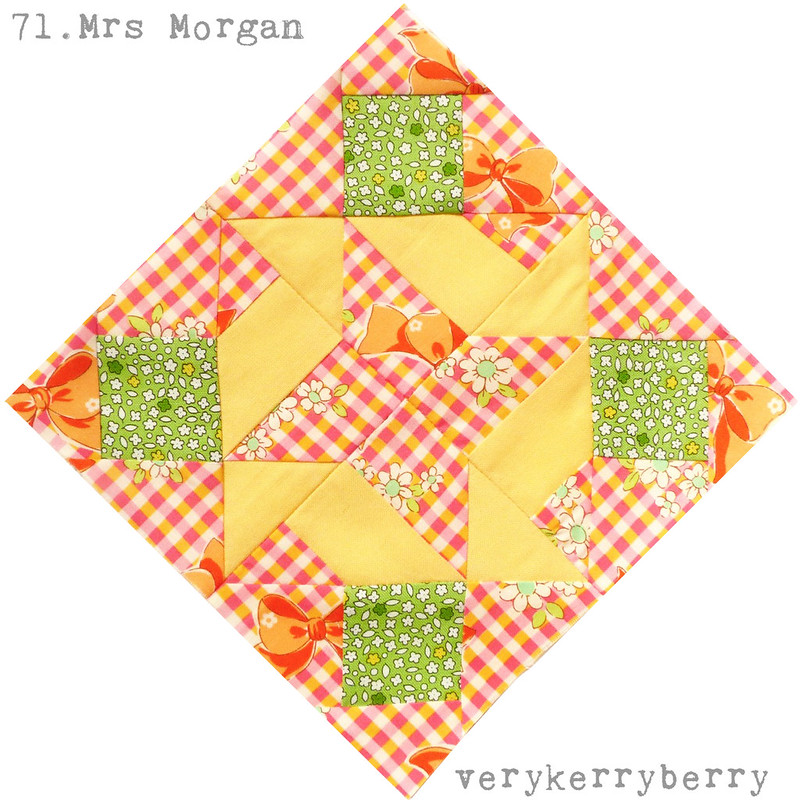
Back for another Farmer's Wife 1930s QAL Monday and two new blocks.  First up is 71,  Mrs Morgan. It was straightforward and didn't present any particular problems.  The block is a mirror
image to the book version because the foundation paper piecing pattern is not reversed on the CD.

71.Mrs Morgan


Fabric credits:

{Please note:  I have linked to my sponsors for fabric bought through them and elsewhere for anything that has come from other shops}

The accompanying letter for this block is a rather sweet read about community theatre groups and worth checking out.

I precut my fabrics to foundation piece this block.  The dimensions below will give you some wiggle room and are approx ¼" bigger than they need to be.

Rotary Cutting Dimensions 
A2, B2, C2, D2: cut (4)  2 ⅛"squares in green
A1, A4, B1, B4, C1, C4, D1, D4: cut (2) 3 ½" squares in peach.  Sub-cut each square along each diagonal corner to corner producing 4 quarter square triangles for each square.  Yield= 8 QSTs
E1, F1, G1, H1, : cut (1) 3 ½" squares in yellow.  Subcut each square along each diagonal corner to corner producing 4 quarter square triangles for each square.  Yield= 8 QSTs
A3, B3, C3, D3, E4, F4, G4, H4: cut (4) 2" squares.  Sub-cut each square in half along the diagonal, producing 2 half square triangles for each square.  Yield= 8 HSTs

For the remaining pieces, E2, E3, F2, F3, G2, G3,H2, H3, use freezer paper templates and this method. 

When it comes to sewing the sections together  I find it easier to remove the paper and draw in any points where the seams need to meet precisely before I pin them together using this method.

Seam matching

Top tips for this block
  • Pre-cut all pieces
  • Use a water based glue stick. I use Sewline, to stick the first piece of each section
  • Chain piece sections 
  • Mark in seam allowance where needed to accurately join sections 
  •  Pressed section seams to one side
  • Flatten seams with Flatter or similar light starch spray

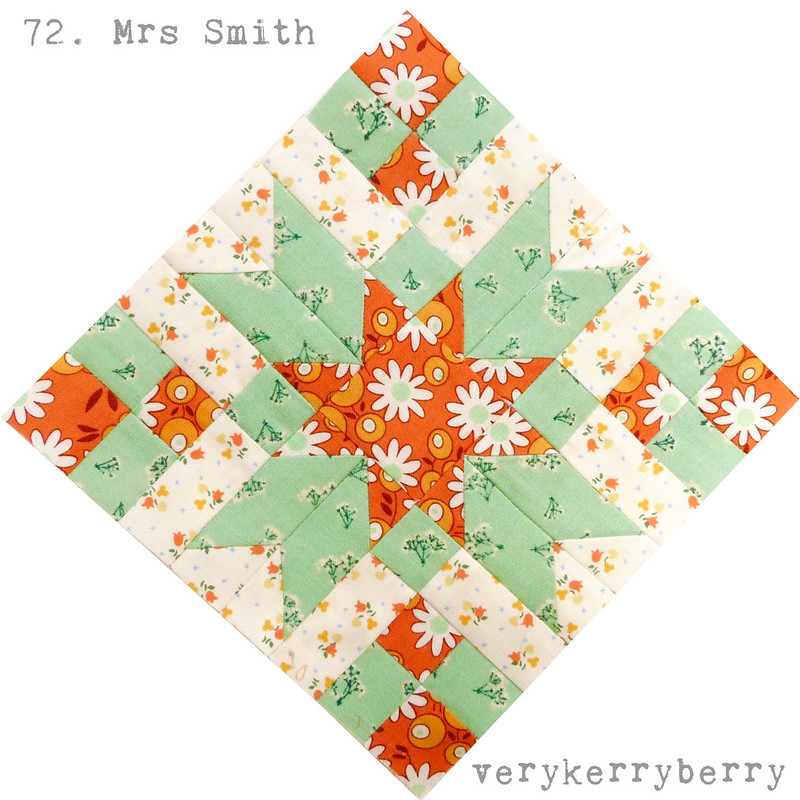
Mrs Smith, is a block of many pieces, but they do fit together in a relatively straightforward manner- even if it does take a long time to piece!  Hannah of Quirky Hannah is guest blogging for this one, pop over to read her account.  This is my version:

72.Mrs Smith


Fabric credits:
Lori Holt for Riley Blake, Flower Patch, Flower Berries orange
Riley Blake, Fancy and Fabulous Breath in mint
Darlene Zimmerman for Robert Kaufman, Grandma's Garden, spring

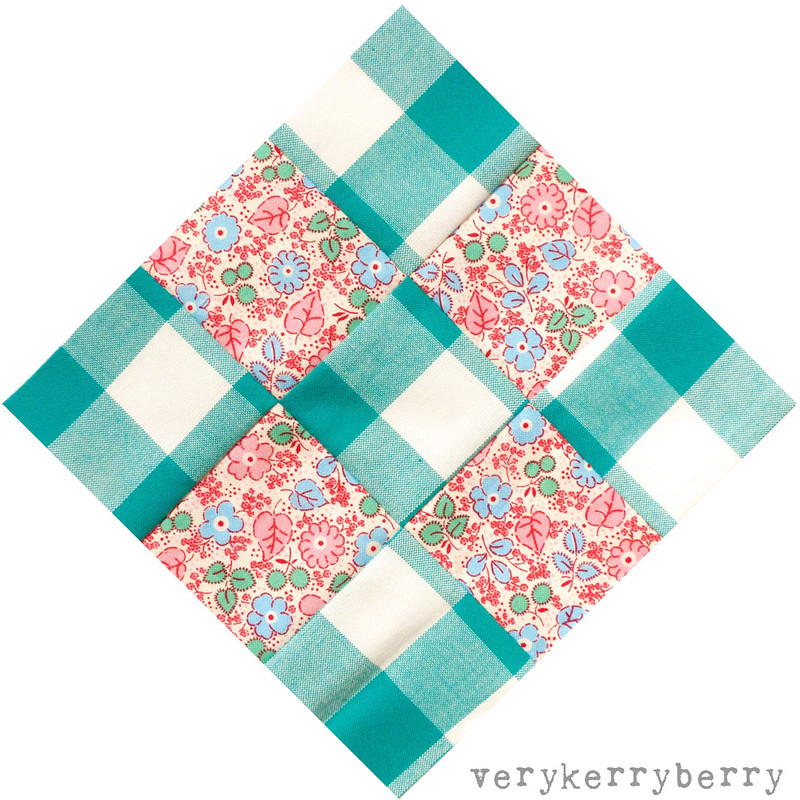
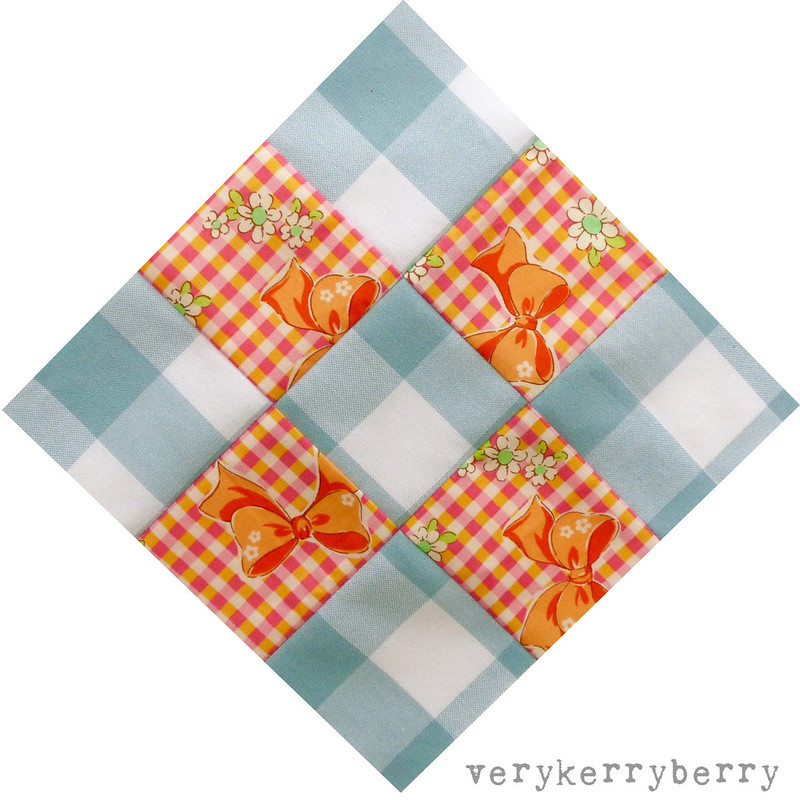
Here are my nine patch blocks as a little side line- using fabrics from the quilt along with Robert Kaufman Carolina 1" gingham.


ninepatch2

ninepatch3

Remember you can:
  • Hashtag  #fw1930sqal on Instagram and add photos to the Flickr group if you like to share there.  
  • For individual blocks, you can use #MrsMorganblock and #MrsSmithblock on Instagram, Fat Quarter Shop and Angie are using these hash tags, #fw71MrsMorgan,  #fw72MrsSmith - I'm using both hashtag systems.
  • You can also copy and paste links to any blog posts you do on these blocks in the comments and I'd love to visit and take a look. 
Chase is back to guest blog next Monday.  She has actually completed her 99 blocks and they look amazing, so colourful!  You can see them in this post.

sib blog

Wednesday 18 May 2016

May at Plush Addict: Take Nine

Time for my May selection from sponsor,  Plush Addict .  This month, I can see my favourite colour, turquoise, has definitely influenced my choices!  I've selected three dressmaking fabrics, five quilting cottons and a gorgeous Gutermann thread collection that I bought recently from Plush Addict with an eye on sewing up some Closet Case Files Morgan jeans- partly out of personal challenge and also curiosity if I can make a pair that fit and are comfortable - I rarely wear jeans.  
May Plush Addict
  1. Alison Glass for Andover, Sun Prints, Spots Turquoise.  I love this colour combination, so vivid!
  2. Tropicana - Flamingos on White.  I have a feeling that Flamingos will be this year's 'Pineapple'!    It's already flying out of the shop- not sure if flamingos fly though ;) I've seen a lot of children's wear featuring Flamingos so this could be a good choice for little girl dresses and skirts as well as quilts.  By Lewis & Irene, see more here. 
  3. Tales of the Sea, Mermaids on Blue.  Mermaids are popular this year with the rerelease of Windham's Heather Ross Menocino line, this is Lewis & Irene's take on the underwater siren theme- lovely blues.  See the rest of the line here. 
  4. Cotton Shirting Ribbed Stripe.  This fabric has a slight ribbed texture to it. Great for shirts and also shirt dresses (you may want to line bodice/skirts).  The stripe suits patterns like this Vintage Vogue design where can place lines in different directions to create new visual effects.
  5. Gutermann Jeans/Denim extra strong thread set.  I ordered these last month and I love how they look.  The mid blue threads are slightly variegated so they blend into denim.  They are also a mix of 70% poly/30%cotton.  There's also top stitching colour options along with a dark indigo thread (these are 100 % poly). 
  6. Cotton Jacquard -Coral Pink Dobby.  The square dots in this lightweight dressmaking cotton are woven into the fabric.  Perfect for gathering, summer tops, lightweight blouses. 
  7. Alison Glass for Andover, Sun Prints, Packed Floral in Pink.  I like the delicacy of this print along with the boldness of the colours. 
  8. Riley Blake Greatest Adventure Clouds Multi- continuing the many rain themed fabrics around at the moment.  I like the colour combo in this one.
  9. Luxury Crepe in Aqua.  Quality dressmaking fabric in a glorious colour.  This fabric drapes wonderfully- imagine swishy, floppy palazzo pants or a draped lined dress.  Women's wear Designs from 1940s often work well in crepe. 

sib blog


How to Make a Quilt: Recollections Quilt

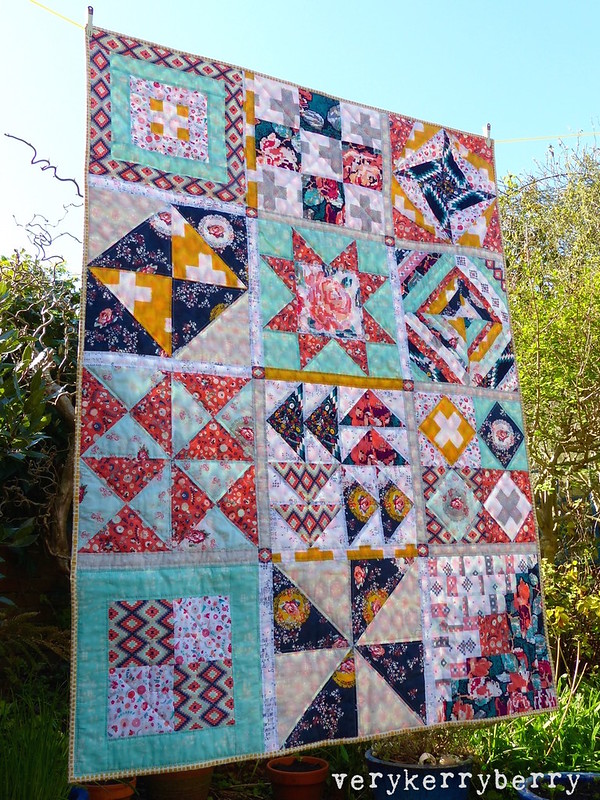
This quilt came about through writing a ten-part series 'How to Make a Quilt' for Sewing Directory.  It's a simple sampler quilt and tutorials for all the blocks, covering techniques from basic nine-patch construction though to foundation paper piecing, basting, binding and a lot more in between.
Recollections Quilt 1

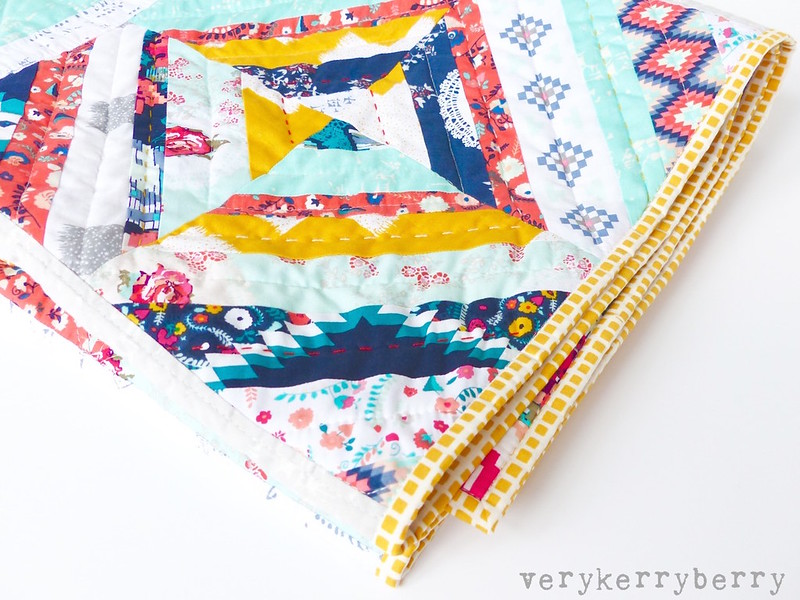
The fabric was provided by Sewing Directory, it's Recollection by Katarina Roccella for Art Gallery Fabrics and it was a departure for me to leave my scrappy approach missing different fabric lines from my stash and instead just use one collection and I really enjoyed it.   The binding is Square Elements, also by Art Gallery.  

Recollections binding

Art Gallery fabrics are a lighter weight than most traditional quilting cottons and have a lovely smooth handle.  Having a quilt which is all Art Gallery cotton, including the backing fabric and the binding is a total luxury.  The feel is amazing!  I used a light batting- Hobbs 80/20 so the lap size quilt is wonderfully floaty. 

Recollections block

The finished quilt is a lap size,  (38" x 51") the blocks are 12" and there is a skinny strip of sashing between each one.  The width means that standard quilting fabric is just large enough to be the backing fabric so you don't have to join pieces together. 

Recollections Quilt 2

Recollections is an apt title for this quilt.  I gave it to my Granny on her recent birthday.  She is suffering with dementia which is creating some very stressful mental health episodes for her in amongst all the other challenges.

Recollections Blocks

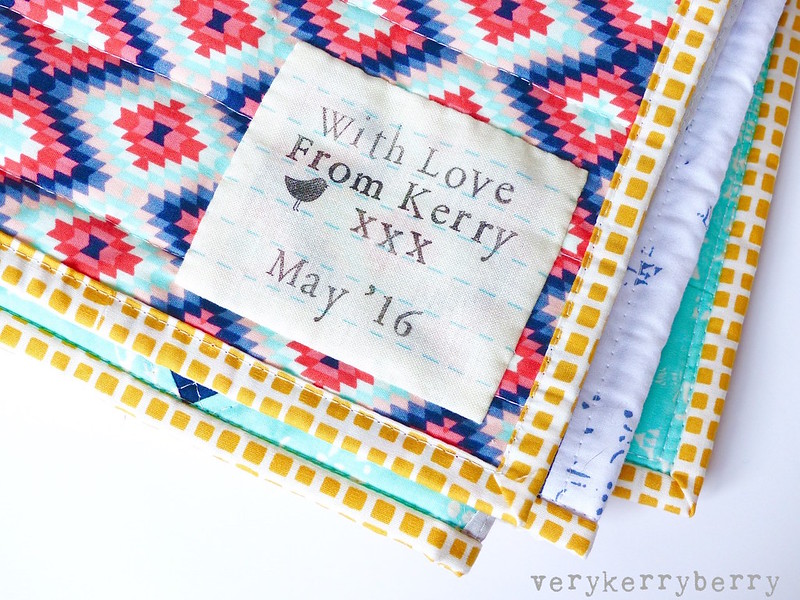
She has been away from her home and in hospital this last month.  Her next move will be into a specialist residential care home which breaks my heart but is unavoidable so having a quilt will help add a personal touch on her journey there. To have lived independently for 94 years and then in a very short space of time, lose your independence and not even be able to return to your own home is an incredibly sad state of affairs.  I printed and sewed on a name tag when I created the quilt label- it's a sobering task when it's usually associated with labelling school clothes.  

Recollections Label

It was well received.  The colours are bright, she loves florals and it's a talking point for her visitors too.  The stamp was created with Versacraft ink.  I've used them many times for quilt labels and they last well during washes and daily wear.    You can find all ten of my Making a Quilt series here.   It's suitable for beginners and more experienced quilters may pick up a few extra tips here and there.  Each part shares techniques and a list of resources and links to explore from some of my favourite quilters.  It's Dementia Awareness Week 15th-21st May and you can find out more about dementia here.  At the moment, I feel lucky, I still have some quality conversations with my granny and she definitely knows who I am.  Other aspects of her life and mental wellbeing are a lot more challenging but I focus on where we are now, that's enough. 

sib blog


Monday 16 May 2016

Farmer's Wife QAL blocks 69 and 70: Mrs Keller and Mrs Lloyd


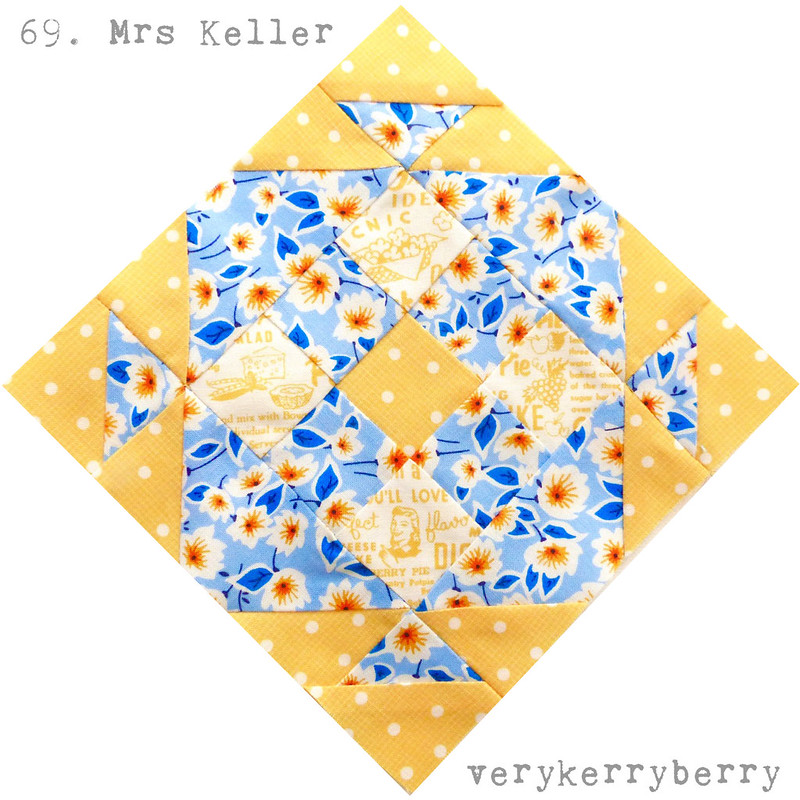
Welcome back to another Monday at the  Farmer's Wife 1930s QAL.   I am having problems loading pictures to blogger so apologies if you couldn't see pics, if anyone has any idea on what the problem might be, please let me know!  I've had to load photos to Flickr first and embed as a way round it.  This weeks blocks take a little while but are nowhere near as tricky as last weeks!  First up is block 69, Mrs Keller (p. 228, letter p.92).   I played around very slightly on the colour plan for this one.

69 Mrs Keller

Fabric credits:
Pam Kitty Ping Pong 2 in yellow, Holly Holderman, Lakehouse DryGoods (gift from friend)
Pam Kitty Recipe Text fabric, Holly Holderman, Lakehouse DryGoods (gift from friend)
{Please note:  On both blocks I have linked to my sponsors for fabric bought through them and elsewhere for anything that has come from other shops}

The only thing to note on this block is if you choose to foundation  piece, section C can be pieced in a different order to allow the seams to nest.  Change C1 to C3, C2 stays the same and C3 becomes C1.  It only makes a small difference  but it's makes the construction of the middle nine-patch section a little easier.

Rotary Cutting Measurements
Squares: cut (4) 2" squares in blue, (4) in yellow
Half-square Triangles: cut (2) 2 ½" squares in blue and (6) in yellow; sub-cut each square in half  diagonally to yield 2 half-square square triangles. (Total yield= 16 QSTs)
A4, B4, C4, D4: either use a freezer paper template and this method, or cut (4) 2 ½" x 4 ½" rectangles in blue.

Top tips for foundation piecing this block
  • Pre-cut all pieces
  • Use a water based glue stick. I use Sewline, to stick the first piece of each section
  • Chain piece where possible 
  • Mark in seam allowance around edge of each section before joining together to improve accuracy  
  • Flatten seams with Flatter or similar light starch spray

Block 70, Mrs Lloyd (p. 229, letter 76) has a lot of pieces but fits together neatly.  Melinda is guest posting on this block so hop on over to her blog to read her thoughts about colour palettes; it's a very interesting read and your can see how she's experimented with different colour combinations.

70 Mrs Lloyd

Fabric credits:
Kona Candy Pink
Judie Rothermel, Aunt Grace Sampler for Marcus Fabrics
Summertime by hemmer design for Red Rooster Fabrics

As a side line, I'm doing an extra easy quilt using the 1930s fabrics from this project and some beautiful candy coloured 1" Carolina Gingham fabrics.   I have only found limited colour ways in the UK so I bought a selection from an Aussie shop, Ministry of Fabric.

ninepatch1

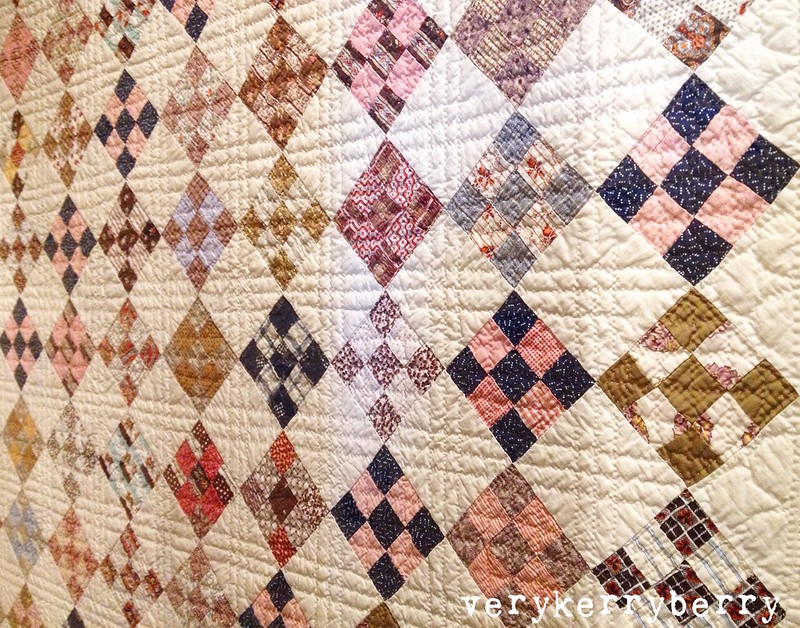
It is a simple nine-patch on-point style quilt inspired by this quilt in the American Museum in Bath and my desire to have a keepsake of all the wonderful colours and prints from the quilt along.

Nine Patch- 19th C- Bath

My daughter will have the Farmer's Wife quilt so I 'need' something of my own.  I have no particular plan for size or material requirements, instead it will grow as the blocks are sewn.  The individual squares are cut at 2 ½" and each block is 6 ½" unfinished.  Quick to do in comparison to the Farmer's Wife blocks!

Remember you can:
  • Hashtag  #fw1930sqal on Instagram and add photos to the Flickr group if you like to share there.  
  • For individual blocks, you can use #MrsKellerblock and #MrsLloydblock on Instagram, Fat Quarter Shop and Angie are using these hash tags, #fw69MrsKeller,  #fw70MrsLloyd - I'm using both hashtag systems.
  • You can also copy and paste links to any blog posts you do on these blocks in the comments and I'd love to visit and take a look. 
Hannah returns with a guest blog post next week.


Tuesday 10 May 2016

May at Village Haberdashery

May is a time of mixed weather in the UK and I think this is reflected in my monthly choices for one of my sponsors, Village Haberdashery.  Sunshine, flowers, showers- they are all in there along with a range of substrates including bark cloth, dobby cotton, brushed cotton and knit for quilting, crafts and dressmaking.

From left to right:
  1. Greatest Adventure- Clouds in navy, cute print with an outdoors/weather theme- I've mentioned before how rain related prints are very popular this year!  I like the colours in this collection. See related prints here. 
  2. Valencia- Colour play in orange, by Laura Gunn.  Pretty and vibrant water colour print on quilting cotton.  This reminds me of early 1960s dress fabrics. 
  3. Sailor's Dobby- Double dot in navy.  Lightweight cotton dressmaking fabric from Robert Kaufmann.    The dots are woven into the weave.  Love the nautical feel to this and there is a much lighter colourway here
  4. In Theory Zenith in Gold- gorgeous barkcloth fabric from Cloud 9.  Great weight for skirts and jackets.
  5. Cotton Candy Collection by Susan Driscoll for Dashwood Studio.  Delicious colour palette and lively mix of florals and geometrics.  A very strong collection from the dynamic Dashwood Studio.
  6. Succulence cotton/lycra knit by Bonnie Christine for Art Gallery.  See this fabric in a Tilly & the Buttons Agnes top in the Art Gallery look book, page 25!
  7. Lore- Olympus in Navy by Leah Duncan for Cloud 9.  Organic cotton and a folkloric inspired but modern looking design. 
  8. Nani Iro- Fuccra in Rakuen,  Brushed Cotton.  Stunning print from Naomi Ito for Nani Iro on a soft cotton base cloth.  Perfect for lounging clothes or even luxurious pyjamas. 
  9. Momo, Flying Colours- Raindrops in Sky.  Cute mixer style rain print from Momo for Moda.

sib blog

Monday 9 May 2016

Farmer's Wife QAL Blocks 67 and 68: Mrs Brown and Mrs Fay

Over two thirds of the way in now and here are the next two blocks in the Farmer's Wife 1930s QAL.  Block 67, Mrs Brown (p. 226, letter 103) is a nine-patch style block with economy squares and half square triangles.  Charise is guest posting for this one so click on over to Charise Creates to see what she's done with this block- it's a great candidate for fussy cutting!   Here's my version:


Fabric credits:

{Please note:  On both blocks I have linked to my sponsors for fabric bought through them and elsewhere for anything that has come from other shops}

One of my cats ended up wandering in a different direction, my daughter has already called it 'spider cat'. 

Block 68, Mrs Fay (p. 227, letter 124) is a challenging block to sew by machine.  There are Y seams galore and you will definitely need a seam ripper as a constant companion.  Hand piecing the block is easier than machine piecing.


Fabric credits:

How to sew a block with Y seams: Step-by-step
Y seams are inset seams that are used when a section or shape needs to be set into a quilt block.    They occur at a place where three seams and three fabric pieces come together at a single point creating a Y shape.   At the point where there is a Y seam, instead of a continuous seam that extends into the seam allowance,  a Y seam instead requires the seams to be sewn precisely on the seam line and not in the seam allowance.   In English paper piecing or when hand piecing, it is standard practice to sew only the seam lines, leaving the seam allowances mobile/floating so they aren't stitched down and can be pressed in any direction when the block is complete.  Before I started sewing this block, I identified the Y seams as they come in two stages of making the block.  This block is made of a central square and eight sections fit around the square. The sections are made of smaller sections (shown in yellow and blue below) and contain a Y seam where they are sewn together.

1.  To be aware where the Y seams were, when preparing the foundation paper piecing templates, circled each Y seam.  Remember other prep such as colour coding and pre creasing all the seam lines with a Hera marker and ruler.


2.  I recommend  pre-cutting all the pieces before starting sewing.  Rotary cutting instructions are given for the squares and the triangles.  Cut the centre square to the exact size, cut all the other shapes at least ¼" larger. For the diamond shape, I used a freezer paper template using this method.  


3.  The sections comprised of square/half square triangle can be sewn in the usual way.  The section with the Y seam needs to be sewn so that the seam stops securely where the Y seam will be and doesn't extend into the seam allowance.  This needs to be done very precisely:  I count three stitches forwards and backwards at this point,  it also helps to hand crank your machine needle where these precise seams start or finish.  


4.  Then trim all the sections, use scissors for the inward edges next to the Y seam.  On the reverse, peel back the paper and add ¼" seam allowances around all the edges with a soft pencil.  To sew the sections together, pin as shown in the pic below, matching seam points precisely.  Sew from the outside edge to the Y seam, stop and secure the seam. Again precision is key, one stitch over will mess up your Y seam.  A top tip to remember is that there should only ever be two layers of fabric being sewn at the seam point of a Y seam, so make sure that no extra layers get caught in the stitches. 


To sew the next seam, ensure A3 paper is torn off so the seam can flip over.  Adjust and pin your fabric edges checking that the penciled seam allowances meet exactly.  The Y seam starts and is secured precisely where the previous seam ended, and is then sewn to the end.   Press. 


Repeat until all the sections are joined in this way.  These are then paired together (the seams will nest) to make an isosceles trapezoid.   Make four of these in total.  Now for more Y seams, you can see them identified by stars in the diagram below. 

Sewing the trapezoid sections to the centre square is just like sewing a spool block.   To join the first trapezoid to the centre square check that both have seam allowances marked in pencil on the reverse. Match seam allowances precisely and pin together.   


With the square on top, sew along the seam line securing at the beginning and end and not letting any extra stitches go into the seam allowance.  Repeat with the opposite trapezoid.  I don't press at this point, I just smooth the fabric with my fingers.   Now sew the remaining trapezoids to the remaining outer edges of the square.  The square should end up with what looks like a continuous seam in a square shape but is instead four straight seams.  The diagonal edges are not yet sewn together at this point.


To join the diagonals, ensure that seam allowances are marked in pencil on the reverse.  Pin the centre point of the seam where the diamond points meed square shape is formed in the block and baste with a few machine stitches.  


With this point accurately basted, pin the top and bottom edges of the seam and starting at the centre square, ensure there are only two layers of fabric under the needle, start and secure the seam and sew to the outer corner.   Repeat this process on the remaining three diagonal seams.   Now press the diagonal seams open and press the rest of the block on the reverse and right side, using starch to help flatten bumpy seams.   When it comes to pressing seams,  I go with what feels right- whatever reduces bulk the best or doesn't show through.  It needs to be considered according to block and fabric, for me there are no hard and fast rules.


It is a punishing block and took me hours and a lot of unpicking to do as I aimed to get everything just right.  Y seams are tricky and this is a small block with little pieces so it is undeniably challenging even for an experienced Y seam piecer.  If you completed it, well done and if it beat you or you didn't dare start, it can be substituted with a block of your choice. 

Top tips for foundation piecing this block
  • Pre-cut all pieces
  • Mark Y seam points on paper pattern pieces.
  • Use a water based glue stick. I use Sewline, to stick the first piece of each section
  • Chain piece where possible 
  • Mark in seam allowance around edge of each section 
  • Flatten seams with Flatter or similar light starch spray
Remember you can:
  • Hashtag  #fw1930sqal on Instagram and add photos to the Flickr group if you like to share there.  
  • For individual blocks, you can use #MrsBrownblock and #MrsFayblock on Instagram, Fat Quarter Shop and Angie are using these hash tags, #fw67MrsBrown,  #fw68MrsFay - I'm using both hashtag systems.
  • You can also copy and paste links to any blog posts you do on these blocks in the comments and I'd love to visit and take a look. 
Melinda is back as a guest blogger next week and I'm looking forward to slightly easier blocks!

sib blog